Running a homestead requires a lot of effort. Of course, you can go to the nearest store and get yourself a cordless drill or an electric-powered chainsaw. But, it is important to keep in mind that you cant always rely on electricity when you’re taking care of daily tasks.
After you’ve decided to go off the grid, you will face the need for various tools that don’t require electricity to charge them or gas for refueling. This is why creating your own tools at your homestead can be a great option, to help you get the most out of your sustainable lifestyle. With these recommended tools that you can make at your homestead, you will learn how to handcraft these items with materials that you probably already have on hand. .
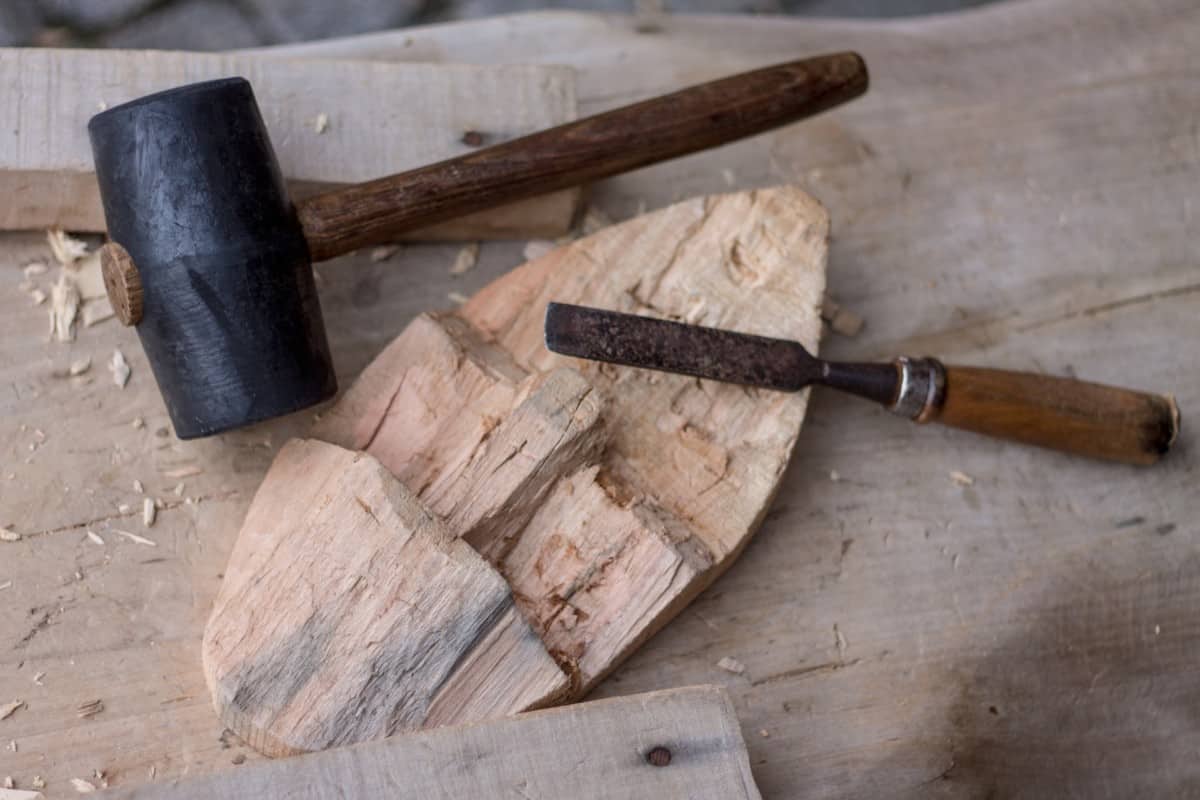
Create Your Own Mallet
One of the easiest materials to work with is wood, leading into the first project of creating a wooden mallet. This tool will help you with other tool-making ideas, plus the crafting process is rather simple to complete.
You will need:
- Piece of wood
- Large wooden block
- Chisel
- Hammer or another mallet
- Axe
- Hand planer
To start, you will need to prepare a handle. It is recommended to stick to a square-shaped mallet because it will be easier to make and more comfortable to hold. Take a piece of wood (oak is preferred for its durability), mark the comfortable size of a handle, and then use your axe to cut it. Then, add a final touch with a hand planer.
Hint: Make sure that the handle is narrower towards the end so that the head will sit on it firmly.
Next, grab an oak block and mark a square on it for a hole. This hole should be a bit smaller than the handle’s thickest end. Now, it’s time for a chisel and a hammer. Attach a head to a handle, and you will be good to go with a brand new mallet!
Garden Hoe
Now that you have a mallet, creating other tools for your homestead shouldn’t be a problem. A garden hoe is a must-have item to deal with those pesky weeds and making one of your own will be even more rewarding to use when caring for your land.
You will need:
- 1-1/4” metal banding
- Wooden handle
- Bolts or rivets
- Mallet
- Hand or electric drill
- Linseed oil
Perhaps most of you have some sort of scrap metal lying around, waiting for disposal. However, it’s a great idea to reuse it and recycle the material for this project. Find a 1-1/4” metal banding or a plate that you can easily bend. Grab a mallet and form a stirrup shape with a slight angle to make it simpler to use for weeding. As for the handle, any long wooden piece will do just fine. Make holes in the stirrup-shaped metal and the handle. After that, connect them firmly with bolts or rivets that you can also find in scrap metal. Add a finishing layer of linseed oil on top, which will make sure that the wood lasts longer, and the garden hoe will be complete.
Make Your Own Shovel For Your Homestead
Suppose you’ve won the battle against the weeds in your yard, now it’s time to do some digging. By crafting your own shovel, you will be able to take care of your land with ease, using what you’ve creating to develop a fruitful outdoor space.
You will need:
- Wooden log (basswood or willow wood)
- Saw
- Axe
- Mallet
- Chisel
- Hand planer
Using a saw, determine the perfect size for your shovel. Even if the log shape is a bit curved, it should still be fine to use. You can either split it or carve out the handle using the whole log, but the first method is easier to perform. For a bit of extra accuracy when splitting, use an axe and a mallet. The head part of the shovel must be thicker, and the whole tool might look like an electric guitar. Don’t forget to use a hand planer or a card scraper to make a handle comfortable to grab. As soon as the handle is ready, take a carving chisel or a spoon-bent gouge to make the head. Then, you’ve got yourself a shovel to use.
Wheelbarrow

Since you are ready to dig holes for your new plants, it’s time to think about how to carry them with comfort. A wheelbarrow is a must-have tool that makes carrying anything around your property simpler. Not only that, but it also looks stunning and adds something unique to your homestead.
You will need:
- Multiple pieces of wood
- Saw
- Wheel with a hub
- Bolts and nails with a mallet
- Hand planer
- Hand or electric drill
Let’s begin with the tray panels. Get several pieces of wood and use a saw to achieve a desirable shape. A hand planer will help you to make the surface smoother. Next, make the legs in the same way.
Hint: You can attach side panels using longer legs.
After you’ve made the tray, cut and plane the support rails that also double as handles. Prepare the holes for the wheel and insert them with the hub. We will stick to a model with a single wheel, which adds extra maneuverability and makes it easier to empty. Screw the bolts, and your vintage wheelbarrow is ready to carry a load!
Create a Rake Right on Your Property
Fallen leaves or cut grass can easily create a mess at your homestead. If you wish to keep your area clean, you will need the help of a sturdy rake. This is another item that we will craft using hand tools only, giving you the ability to make it on your own with ease!
You will need:
- Axe
- Thin tree trunk (maple, willow, poplar)
- Small block of wood (beech)
- Saw
- Hand planer
- Metal banding
- Hand drill
- Chisel
- Nails with a mallet
Cut a thin tree that will serve as a handle. Then remove the branches and plane the handle to make it comfortable to hold. Split one end with a handsaw and attach a ring made of a metal banding to prevent further splitting. When it comes to the head, take a block of wood and shave it just like you’ve done to a handle. As you’ve probably guessed, you’ll need to make the holes for a handle in it with the drill. Other holes for its teeth can be made with a chisel. The last part of this DIY project is to make teeth – use an axe to cut them from hardwood pieces. Insert them into the holes, put everything together, and use the nails to prevent the head from falling off.
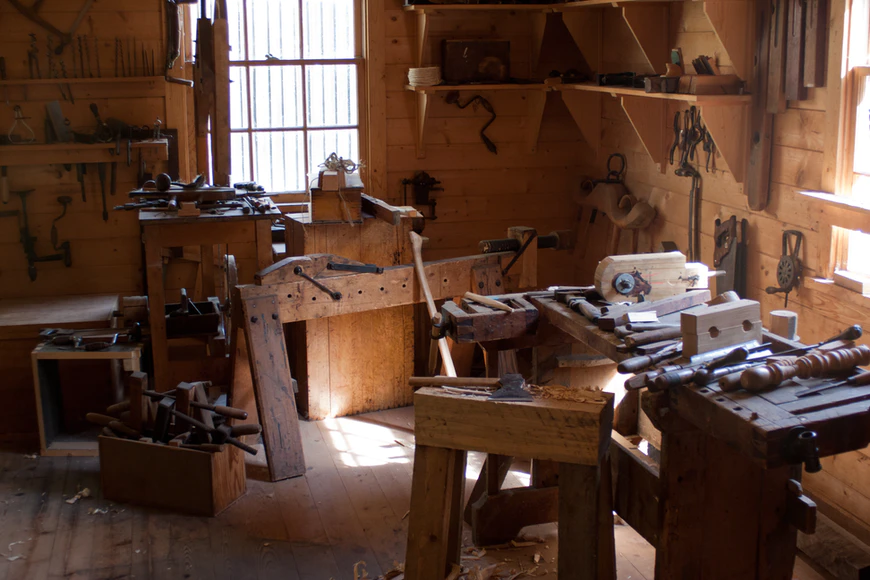
Build a Workbench for Your Homestead

It’s impossible to imagine a work area without a workbench. The even surface adds versatility when it comes to creating with different tools and materials. In addition, it ensures proper cuts with your saw and helps to keep everything organized in your workspace too.
You will need:
- Wooden planks
- Large plywood sheet (optional)
- Saw
- Hand planer
- Screws and screwdriver
- Wheels (optional)
While this description might seem simple and fast to follow, the actual project takes a lot of effort when compared to the other tools. This is due to the amount of time required to work with wood. In the beginning, you will need to prepare wooden planks and shave them with a hand planer. If possible, you can use pallet wood instead. Screw the legs and the frame and check if it’s level. Use a large plywood sheet as a working surface and attach it to the frame with screws by the perimeter. Alternatively, you can stick to wooden planks. Also, you can make the construction sturdier by adding more planks around the bottom. Later, you can upgrade it by adding a bench vise mechanism to it if it’s stable enough.
Frame Saw
How can you create something without the help of a saw? While this part describes only the frame-making process, you can find how to make the blade by yourself at the end of the article.
You will need:
- Block of wood
- Saw
- Chisel
- Mallet
- Screws and screwdriver
- Rope
- Hand planer
For a classic H-shaped design, you’ll need to prepare 3 square bars. One should be a bit longer than the blade. Use it to make tenons with your saw and chisel. As for two other bars, cut mortises with your chisel right in the middle of those. Put the frame together and make cuts with a saw for a saw blade. Insert the blade and pop the screws to hold it. The last thing you need to do is to tie a rope around the top part and twist it with a stick or another bar.
Axehandle
As soon as you notice that your axe handle is starting to chip and the blade is wobbling around, don’t hesitate to replace the handle.
You will need:
- Block of wood
- Saw
- Chisel
- Drawknife
- Hand planer
- Mallet
- Linseed oil
You can use your older handle as a reference and copy its shape. While the pencil can still do its job, it’s easier to go for a marker pen. With the help of your saw and chisel, remove excess off after. A hand planer will make the surface smoother, but you can’t do without a drawknife.
Hint: Go sideways with a drawknife. That way, you won’t have to sand it.
For the blade, don’t shave off too much wood to make sure it sits as tight as possible. To set the axe in the handle, hold it upside down and hit its handle with a mallet a few times. Make a wedge using a planer, insert it with a mallet, and then cut the left material off. It’s recommended to coat the handle with linseed oil to make the wood last longer and remain durable over time.
Making Nails for Your Property
It’s hard to imagine making nails without a melting furnace and metal frame. This is where a new, innovative idea comes into play which uses wood instead of metal. You may wonder how durable this option will be, but don’t worry because if you use a strong, sturdy hardwood, it should last you a while
You will need:
- Block of wood
- Chisel
- Mallet
- Metal plate with a small hole in the center
You first need to grab a chisel and make small bricks of wood with it. These should look like a matchbox. Divide each brick into wood strips and install the metal plate on your workbench so that it doesn’t move or rattle around. You might need to place two blocks of wood under it so that there is free space under the hole in the plate. All that’s left is to smash those strips with your mallet to let them pass through the hole, and you’ll get the proper shape.
Rope
If you need a rope, there is a simple technique that will allow you to easily make one at your homestead. For this project, you will need plant fibers, but you can pretty much utilize any material that you can get your hands on.
You will need:
- Plant fibers (wisteria vine)
- Rock
While this might sound funny, but you will need to crunch the fibers by hitting the vine with the rock to its end. You do this to get to the core to remove it – just peel off the fibers. They might split into several strands, and the thicker they are the better. Next, you do the reverse wrap by twisting it in opposite directions. After it’s twisted on itself, pinch it with one hand. Then grab the other way with your second hand, twist away and pull back. Continue this until you notice that one end is shorter than the other one. Simply add more fiber to it, twist away and pull back. With this method, you will have a strong, sturdy rope in no time.
Building a Ladder for Your Homestead

How often do you need to climb on the roof? Here, you can find a beginner guide on how to make a ladder for your homestead in less than an hour.
You will need:
- Wood for sides and rungs
- Saw
- Hand planer
- Nails with a mallet
- Chisel
As mentioned above, the making process of a ladder is pretty straightforward. You will need to prepare two boards for the sides and plane them if needed. Next up, measure even intervals for the rungs. With the help of the chisel and mallet, make 1” deep spaces and insert the rungs into them. With this tool-making idea, you will be able to complete the project with ease, just keep in mind that all ladders can be dangerous and to be careful.
Extra tools
If you still have access to electricity (perhaps by running a gas generator for a couple of hours, or by using solar energy) and you have a grinder in your shed, we’ll gladly share a few more ideas on what to do with old rusty files and scrap metal.
Knife
Handcrafted knives always have a special feel to them. As for the durability and performance of the tool, this will depend on the type of steel you have. For example, high carbon steel ensures a rich patina, which will make the knife excellent for fruit peeling.
You will need:
- File
- Bench grinder
- 6″ grinding stone
- 6″ flap sanding wheel
- Toaster oven
- Protection gear
Before you get started, prepare the protection gear. It’s recommended that you wear special glasses during the process. The first step is to rough out the profile of the knife. You probably won’t need the original tang, so you can remove it. Let your imagination fly when making the shape of the blade and the handle. When grinding, start with a 45-degree angle. As soon as the sides meet, you can increase the bevel height. Sand the blade and proceed to the handle. Deep scratches on the top of the blade can be removed with a back bevel. This will also help the tip to slice better. To temper the file in the oven set it to 400 degrees and leave it there until the edge gets a slight golden color. This usually takes up to an hour. The last step is to sand off the scale and then you have a homemade knife to put to use in your homestead.
Chisel
A chisel is an irreplaceable tool that can turn any block of wood into a masterpiece. Just like with knives that are made out of files, you can expect them to last quite a long time. Also, you can try this project with the Allen wrench if you need access to a smaller tool.
You will need:
- File
- Angle grinder
- Wooden block
- Saw
- Sanding paper
- Grindstone
- Hand planer
- Hand drill
- Glue
- Metal cap
- Varnish
Use your angle grinder to remove any rust and make the surface shine. You can make its blade thinner if required. After that, sand it and achieve optimal sharpness with a grindstone. For its handle, you can use a log or a wooden block. A hand planer will help you to make it smooth to touch. Again, we recommend making a square handle since it’s easier to perform. Grab a hand drill and make a hole to insert a file there. Don’t forget about the glue and metal cap so that it sits inside firmly. You can coat the handle with varnish or oil so that wood becomes water-resistant and then, the project will be complete with a brand new chisel for you to use.
Frame Saw Blade
If the blade you’ve bought at your nearest hardware store has broken, there is no need to worry about running back to the store. Instead, you can craft a replacement by yourself.
You will need:
- Angle grinder or rotary tool
- Carbon steel shim
- File
- Old saw blade
- Thin pliers
- Hand or electric drill
After you cut a section out of carbon steel shim with your rotary tool, file the burr off and use a marker pen to transfer the outline of the bandsaw blade onto it. Then cut the teeth and grab a file to make them sharp. Set the curve with thin pliers, drill the holes at the blade’s ends, and you are ready to install it into a frame saw.
Making Useful Tools for Your Homestead
If you have been looking for easy ways to design tools for your homestead, these ideas can help you start handcrafting useful tools in no time. Don’t worry if something goes wrong during the process, trying to create your own tools might take some trial and error, but the final result will be worth it in the end.
You will be able to make anything you need without even thinking about buying these items. Plus, you can repurpose old materials, be more environmentally friendly and help the planet by living sustainably.