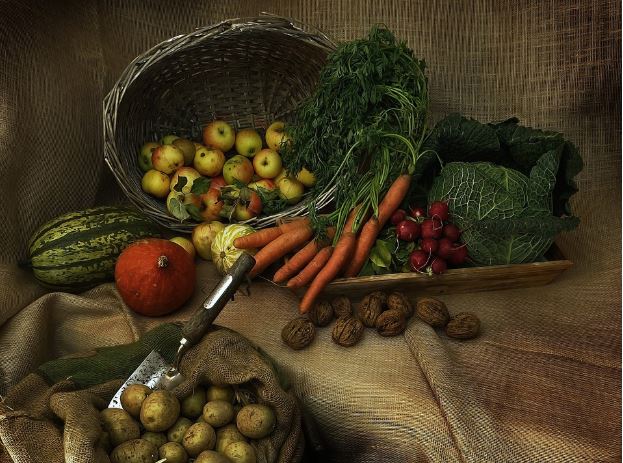
Fresh fruits and veggies are nutritious and delicious. They are also difficult to store properly so they last a decent amount of time. Even with refrigeration, they can break down quickly and unfortunately get thrown out.
However, you don’t even need refrigeration to make your fruits and veggies last. There are some techniques you can use to significantly expand their shelf life to months. Plus, none of them require any special equipment or complicated steps.
From potatoes to berries, there are some great ways to have a well-rounded, well-stocked pantry. You can enjoy the flavors of fresh produce year-round. With these strategies, you can make sure none of your precious produce goes to waste.
Preserving and Storing Root Vegetables
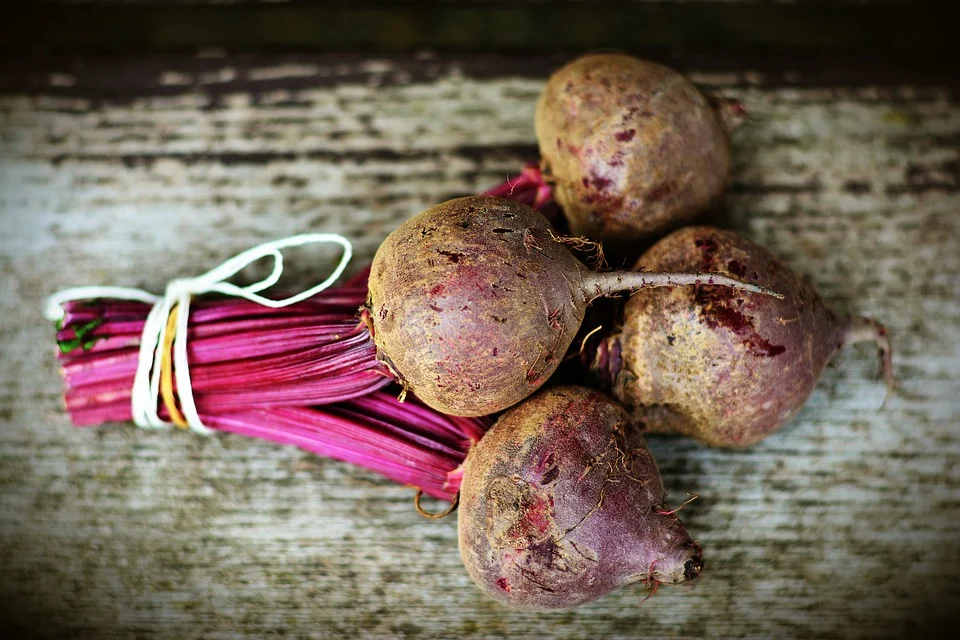
Preserving and Storing Beets
Beets are a great choice for long-term storage. Many choose to pickle them but they are delicious and store well when kept dry. They can even last many months without being refrigerated.
Store your beets in a cool, dry place. Try to find an indoor location where the temperature is as low as possible like a basement or garage in cooler months. It’s also important that the space have as much humidity as possible.
Harvest your beets and remove the leaves and brush off as much soil as possible. You don’t need to wash them before storing them. The key is making sure your beets are completely dry.
Use a box or bin that has a lid and fill it with an insulating material like peat moss or sand. Arrange the beets in the container so there is plenty of space between them. If the roots end up touching, they can start to rot. Make sure they are well-covered and the lid is on to keep the moisture in.
Check on the beets regularly to ensure that the roots are in good shape and not starting to rot. You can add more beets to your storage if space allows. Mist your insulating material with a spray bottle to make sure it is always slightly damp. Your beets should stay fresh in your container for up to three to six months.
Storing Potatoes
Most varieties of potatoes are great for long-term storage. They should be carefully harvested at the end of the season when the skins have toughened up. Discard or eat any partially damaged potatoes as storing them with your good potatoes can ruin the whole batch.
Brush the dirt off and allow them to dry completely. You’ll want to lay them out on top of an absorbent towel or layer of paper and cover them to shield them from light. Let them dry out for a few weeks to harden the skins.
Stored potatoes need to breathe. Look for a container that allows for maximum air circulation. A mesh bag, paper bag, or appropriately named potato sack are all good choices.
A cool area is the best place to keep your potatoes. A temperature of close to 50 degrees is ideal. It’s important to keep your potatoes in the dark as well. Exposure to light can prompt the eyes to start sprouting.
Potatoes should not be stored near onions as they both release gases that can encourage each other to sprout. Your potatoes should last in storage for several months. You want to check on them regularly to make sure they aren’t softening or sprouting. If you spot a rotting potato, immediately remove it before it spread to the others.
Try to eat potatoes quickly if they seem to be going bad. You don’t have to throw them out if they begin to sprout. You can just remove the sprouts and eat them as soon as possible. However, it’s important to not eat potatoes that have turned green. Don’t forget to save a few of the eyes from your potatoes to plant in the garden for next year’s crop!
Keeping Onions
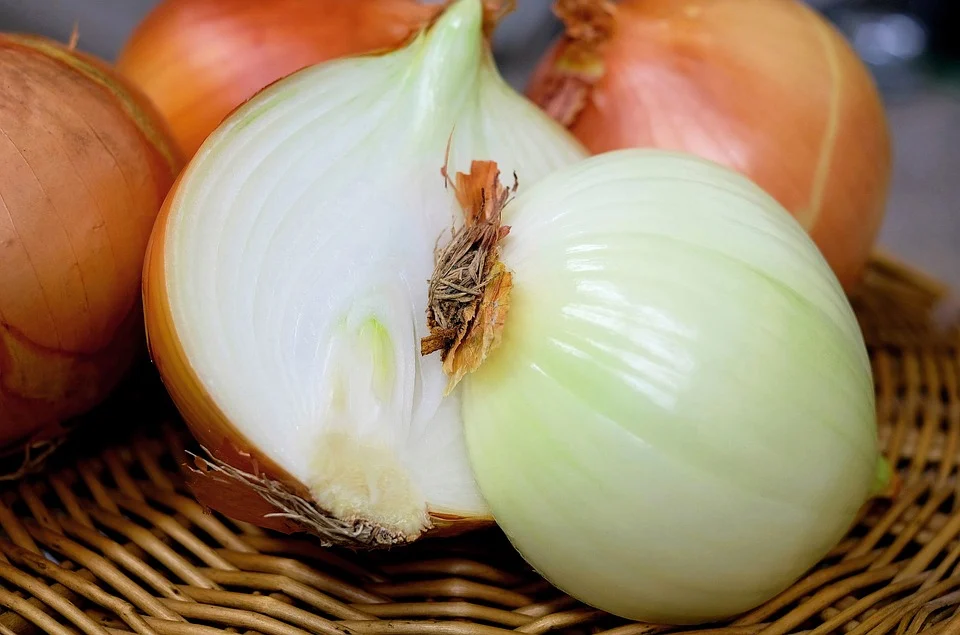
Surprisingly, old pantyhose or long, thin socks are the ideal tools for storing onions long-term. You can use them to keep onions separated. They also allow for the air circulation that they need to keep well.
Harvest the onions and cut off most of the green stalk. Allow them to dry out for a few weeks or until the tops have shriveled before storing them. Immediately use or discard any softened or damaged onions.
Simply cut the leg off the pantyhose or use the sock as is. Slip and onion into the top and work it down to the toe of the foot. Tie a knot and insert the next onion.
You can then hang your filled socks in a cool, dark area with plenty of air circulation. Make sure it’s dark and your onions are kept away from neighboring vegetables. Their strong flavor can transfer to other foods.
Check on your onions to make sure they aren’t starting to soften. You can simply cut an onion from the bottom of your sock each time you need one. They should last for several months if kept cool and protected from light.
Storing Garlic
Braiding the bulbs is a super cool way to store garlic. It looks awesome and rustic hanging up in your home. Plus, it makes the garlic last longer.
Harvest garlic why the tops start to dry up and turn yellow. Gently dig it up to avoid any damage. Then, lay them out in a cool, dark place and allow them to dry out for a few weeks. Check on them every few days to make sure the stalks are drying out but not completely hardening.
Once they are dry, you can braid the stalks together to form a rope. Tie your first three bulbs together with some string and continue to add more stalks to the braid as you go. This can then be hung in a cool, dry place. Whenever you need a bulb, simply cut it from the bottom of your braid. Practical and pretty!
Storing Carrots
Carrots can last up to six months when they are stored properly. They also prefer a cool, damp environment. Like, beets, an insulating material can help keep them fresh.
Carefully sort through carrots to make sure they are intact and have no damage. Trim the stalks and leaves from the top so only a small bit remains. Wipe dirt from the carrots and allow them to dry completely.
Find a wide container like a plastic bin or even a cooler. Line the bottom with a layer of peat moss or sand. Spritz it with water and place a row of carrots on top, being careful that they don’t touch. Then, add another layer of peat moss or sand. You can continue these steps until you fill your container or run out of carrots.
Place the lid on the container but leave it cracked to ensure plenty of ventilation. Make sure to spray the sand or peat moss whenever it dries out. You can work your way down, layer by layer, using the carrots as needed.
Pickling and Canning Vegetables
Pickling is a great way to add flavor to foods and preserve them. Adding other ingredients that naturally fight bacteria like garlic and onions can increase their shelf life. The vinegar serves as a pickling agent, encourages fermentation of vegetables.
Sterilizing Jars is Very Important For Preserving Vegetables
Before pickling or canning, you’ll want to sterilize your jars and lids. Luckily, this is a pretty straightforward process and just requires some simple tools that you likely already have. You need a large pot, tongs, and a towel for drying.
Place your empty jars in the pot with the openings facing up. Fill the pot with hot water so that the jars are covered by at least an inch or two of water. Then, place the pot on the stove on high heat.
Bring the water to a rolling boil. This is when the sanitation begins and you can start timing. The number of minutes you need to boil your jars is a little more complicated.
The number of minutes it takes to safely sanitize your jars depends on your altitude. If you live at sea level, you can boil for ten minutes. However, if you live above sea level, you should boil your jars an extra minute for every 1,000 feet of altitude.
For example, if you live 3,000 feet above sea level, you’ll need to boil your jars for thirteen minutes. Don’t know your level of altitude? You can boil your jars for fifteen to sixteen minutes just to be on the safe side.
After the jars have boiled, carefully remove them from the water with the tongs. Allow them to cool and dry on the towel. Add the lids in the still boiling water and boil for the same amount of time before removing them and allowing them to cool as well.
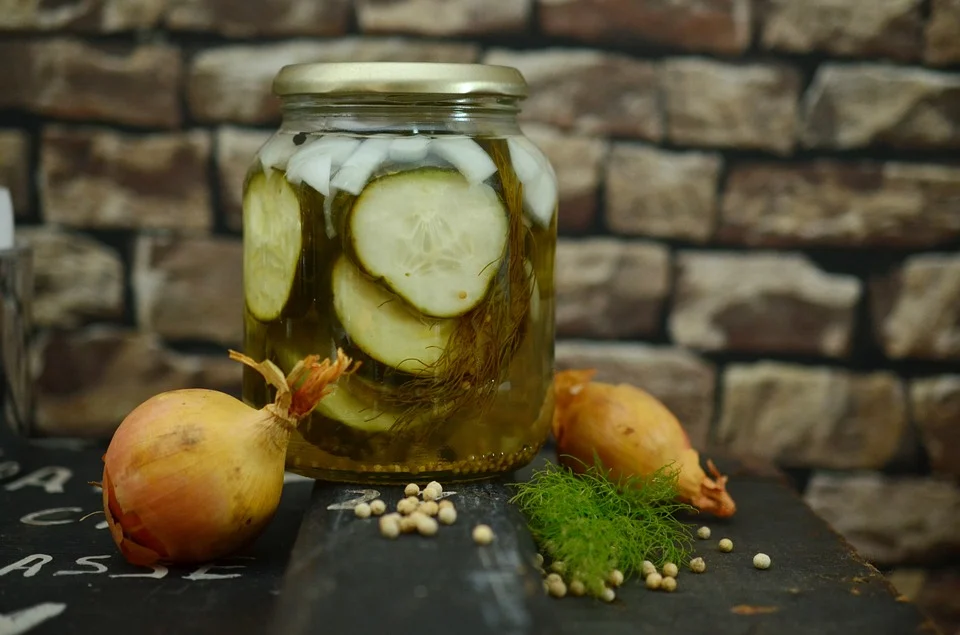
Pickling Cucumbers
Cucumbers are one of the most popular foods to pickle. They are often in abundance for certain times during the growing season. Pickling them allows for storage of a full crop so none go to waste.
Select fresh, healthy cucumbers for pickling. Look for straighter ones if you plan to leave them whole or make spears. This will allow them to fit in the jars better.
Taller, larger jars are perfect for pickling cucumbers. You can either leave smaller cucumbers whole or quarter larger ones to fit in the jars. They can also be cut across every quarter of an inch to make pickle slices.
Pack the cucumbers in the jar so they are full but not smashed. Bring enough vinegar to cover your cucumbers to a boil. Add about a tablespoon each of salt and sugar for every cup of vinegar. You can add more or less of either depending on the flavor you prefer.
Pour the hot vinegar into the jars over the cucumbers. You can also add ingredients to boost the flavor. Horseradish, mustard seeds, and dill are all delicious additions. Tightly seal the jars and store them in a cool place to enjoy later.
Pickled Asparagus
Asparagus is another veggie that pickles well. Try to use fresh, crisp stalks with good color. Trim the bottoms to remove any rough spots and rinse the stalks clean.
Soak them in a bowl of salted water for a few hours before starting. Sterilize jars tall enough to fit the spears with about an inch to spare. Then, drain and pack them in the jar with the tips facing up.
Boil enough vinegar to fill the jars and add about a third of a cup each of salt and sugar for each cup. You can also add mustard seed or dill for extra flavor if you have some. Let the mixture simmer for about a minute.
Pour the mixture over the asparagus spears. Leave about a quarter-inch of room at the top of the jar. Seal the jar tightly and store in a cool, dark place like a cupboard or pantry.
Pickled Cauliflower
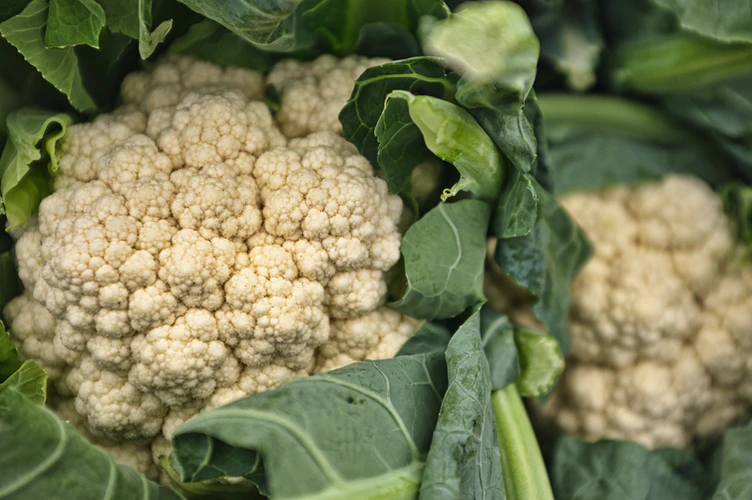
Cauliflower is a vegetable that tastes delicious and keeps really well when pickled. You can pickle it on its own or add it to your cucumbers. You can even add some carrots when your pickling your cauliflower for a burst of color and flavor.
A head of raw cauliflower can quickly go bad, so pickling it is a good way to make it last. You’ll want to use cauliflower that’s fresh and trim off any bad spots. Remove the leaves and stems and break the cauliflower into florets. Soak it in cold water for a few hours then drain it.
Sterilize enough jars to hold your cauliflower with space. Combine one part each of sugar and salt and three parts vinegar and bring to a boil. You can add any seasonings you have on hand like garlic, turmeric, or mustard seed to bring out the flavor of the cauliflower.
Simmer the mixture for five minutes then pour it into the jars. Cover the cauliflower and leave about a half of an inch at the top. Put lids on the jars tightly and you’ll have delicious cauliflower to enjoy later.
Preserving Tomatoes by Canning
Tomatoes are a super versatile food so they are perfect to stockpile. They can be canned in different forms. They can also be used in a huge variety of recipes.
The first step of canning tomatoes, no matter which method you’re using, is to blanch them and remove the skin. First, you slit a small criss-cross at the bottom of the tomato and submerge them in boiling water for a few minutes. When you can see the skin loosening, use a slotted spoon to scoop them out and immediately place them in an ice-water bath.
After they’ve cooled, pull the tomatoes from the cold water. The skin should easily peel off. You can trim the remaining stem from the top.
Smaller tomato varieties like Roma can be easily canned whole or halved. Simply fill your sterilized jars with the blanched tomatoes to about an inch from the top. Add a couple of tablespoons of lemon juice and seal.
Diced tomatoes are a perfect way to preserve tomatoes to use later in salsa and soups. Cut your tomatoes to your desired size and fill the jars to nearly the top. Top with lemon juice and tightly close the lid.
Canning sauce is an awesome way to save tomatoes. It’s also a great use of fresh herb and garlic. Onion, peppers, and mushrooms can even be added.
If using other veggies, dice them and sautee until softened in a stockpot. Cut your blanched tomatoes into small pieces. Use a potato masher or whisk to puree the tomatoes as much as possible. Add the puree to the stockpot and stir in any fresh herbs. Pour the sauce into sterilized jars, leaving about a quarter-inch of space at the top.
Canning Your Corn
Corn on the cob is a super popular crop and is usually in abundance when in season. However, canning allows you to enjoy the sweet veggie all year long. You can either can it raw or cooked, depending on your preference.
Make sure corn is fresh and the kernels are plump. Remove the husk and silk and wash the cobs of corn. Then, carefully cut the kernels from the cob downward, using a sharp knife.
You can choose to can these kernels raw if you’d like. Pour them into a sterilized jar, leaving about an inch of room at the top. Fill the jar with boiling water to about a half-inch from the rim and put the lid on tightly.
You can also cook your corn prior to canning. Add the kernels to a pot and cover with water. Simmer for about five minutes until the corn softened. Pour the cooked kernels into the sterilized jars, leaving about an inch of space from the top and seal them.
Canning Your Peas
Peas are another great veggie to can. They retain their freshness well and are filling. Plus, they are an easy addition to many dishes.
Young pods will give you the best peas for canning. Look for tender ones to get the sweetest peas. Shell your peas from the pods carefully and sort through them to make sure none are bad. Place your shelled peas in a colander and rinse well.
Fill your sterilized jars with peas, leaving about an inch at the top. You can also add a teaspoon of salt to preserve the flavor and freshness. Peas also taste awesome when they are canned with a little sauteed onions or garlic.
Meanwhile, bring a pot of water to a boil. Pour the boiling water over the peas, leaving about a half-inch of space at the top. Tighten the lid and store the peas, ready to be added to soups, or used as a quick side dish.
Sealing Your Canning Jars
After you fill your jars with your veggies, you should the final step to seal them. Sealing your jars extends the life of your preserved veggies. It will help seal in the fresh flavor and give them a longer shelf life. The boiling water method can seal your jars with no special equipment.
Place your filled jars in a large stockpot. Fill the pot with water, enough to cover two inches above the jars. Then, bring the water to a boil and cover the pot. You can boil your jars up to thirty minutes to ensure they are properly sealed.
Then, remove the lid and turn off the heat. Using tongs, carefully place the jars on a dishtowel to cool. Give them a few hours to return to room temperature. To check the seal, press in the middle of the jar’s lid. If it pops up, you should reseal the jar. They can then be moved to a cool spot for storage.
Drying to Preserve Your Produce
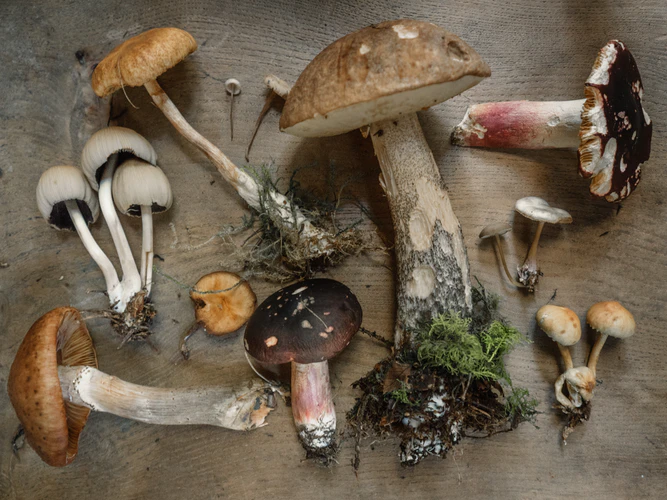
Drying Mushrooms
Mushrooms are a great way to add a boost of nutrients and texture to your dishes. Unfortunately, they have a shorter shelf life. Drying them allows you to enjoy them much longer past their typical timeline of optimal freshness.
You can dry anything from portabellas to shitakes. Either way, start by cleaning your mushrooms well to remove any dirt and soil. Use a dry towel to brush the debris free instead of running them underwater. Then, cut the mushrooms in thin slices to a uniform size.
Space the slices out on a cookie sheet and bake at 150 degrees for two hours, flipping halfway through. Check the mushrooms periodically and try to blot up as much water as possible from the cookie sheet.
Repeat these steps until the mushrooms are completely dried out. They can then be sealed and stored in a cool, dark place. You can later add hot water to rehydrate them or add them to soups and stews.
Drying Zucchini
Zucchini slices make a healthy and delicious snack. The squash is perfect for drying to store for an extended time. It just takes a little work to remove all of the moisture from this dense squash.
Clean your zucchini and trim off any bruises or bad spots. Slice your zucchini into as thin of slices as possible. Just try to make sure they are all the same thickness.
Sprinkle your zucchini with salt and toss it in a large bowl. Transfer it to a colander and allow it to drain. The salt will begin the dehydration process and the zucchini will sweat out the excess moisture.
Preheat the oven to 225 degrees and arrange your slices on an oiled cookie sheet. Make sure there is plenty of room between them and toss them every once in a while to ensure even cooking. Leave them in for about an hour and a half, flipping halfway through.
When all of the moisture is removed, pull them from the oven and allow them to cool completely. Check them to make sure they are perfectly crispy. If not return to the oven to dry for another thirty minutes, checking frequently. Once they are done, store them in an air-tight container for an easy snack to enjoy for months to come.
Enjoying Your Preserved Veggies
Your preserved veggies can last for months when stored properly. The fresh flavors and nutrition can be preserved so you can enjoy them later. You can safely store your vegetables and eat them as you need them.
Careful planning can make the most of your vegetables. Make sure you’re going to use a whole jar of canned veggies before breaking the seal. Check your root vegetables carefully to be smart about using them before they go bad. With a good routine, you can make the most of your vegetable stash and not let any go to waste.